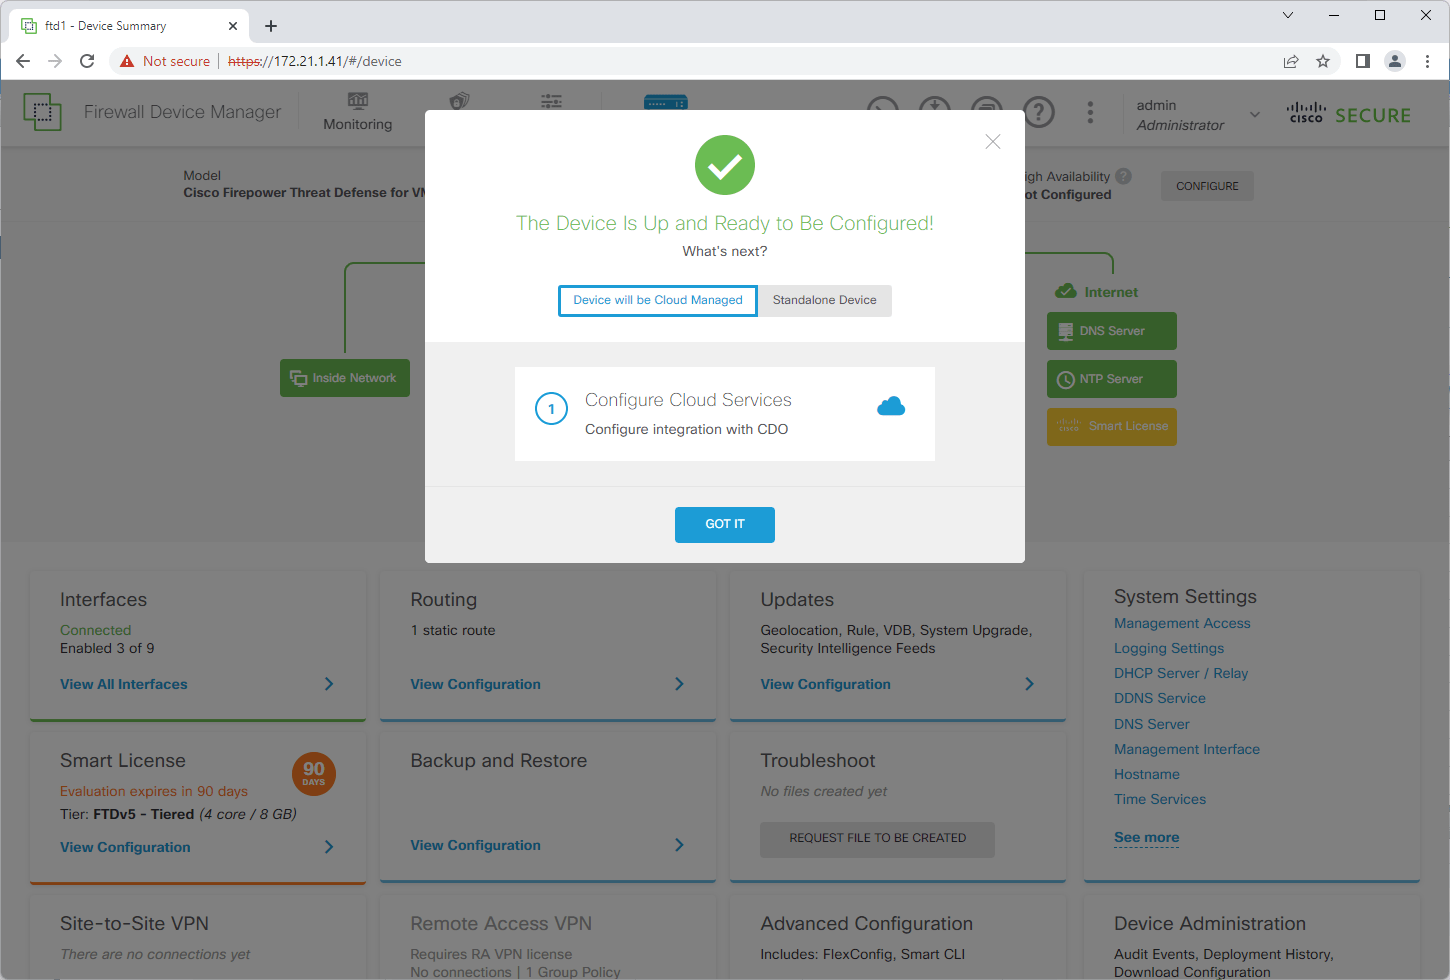
In this Tutorial will be deployed Cisco Secure Firewall Threat Defense Virtual Appliance running on ESXi Host. I will go step by step with both types of management – locally and remotely with FMC. These steps could also be used for production environment install.
This Tutorial is remake of my Firepower Threat Defense Virtual Install Tutorial after Cisco has renamed the product line at the End of the 2021 year.
Cisco states:
“Part of simplifying our portfolio involves the renaming of our security products under one brand, Cisco Secure. Being clear and outcome-focused, this change simplifies communication and will improve everyone’s understanding of how each product secures and protects within the Cisco Secure portfolio. For now, all products will include mention of the former names to easily recognize them during the transition”
more about Cisco Secure portfolio naming Architecture
learn more about FTD in Datasheet:
Cisco Secure Firewall Threat Defense Virtual (formerly FTDv/NGFWv) Data Sheet
Prerequisites:
- VMware ESXi host (7.0)
- Cisco FTDv – VMware install package for ESXi (7.2.0)
- optional – running Cisco FMC – Secure Firewall Management Center (for remote management option)
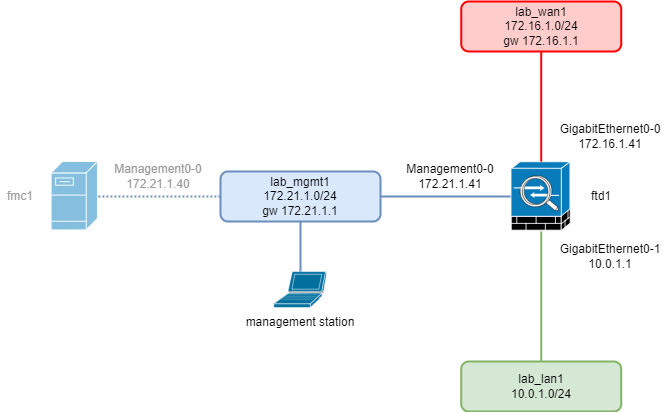
Network Diagram:
1. Download the Secure Firewall Threat Defense Virtual
Download the Secure Firewall Threat Defense Virtual image for VMware ESXi from Cisco.com, and save it to your local computer:
https://software.cisco.com/download/home/286306503/type/286306337/release/7.2.0
Note:
A Cisco.com login and Cisco service contract are required.
2. Create VMware Virtual Machine
2.1 In VMware ESXi Web interface select “Create/Register VM”.

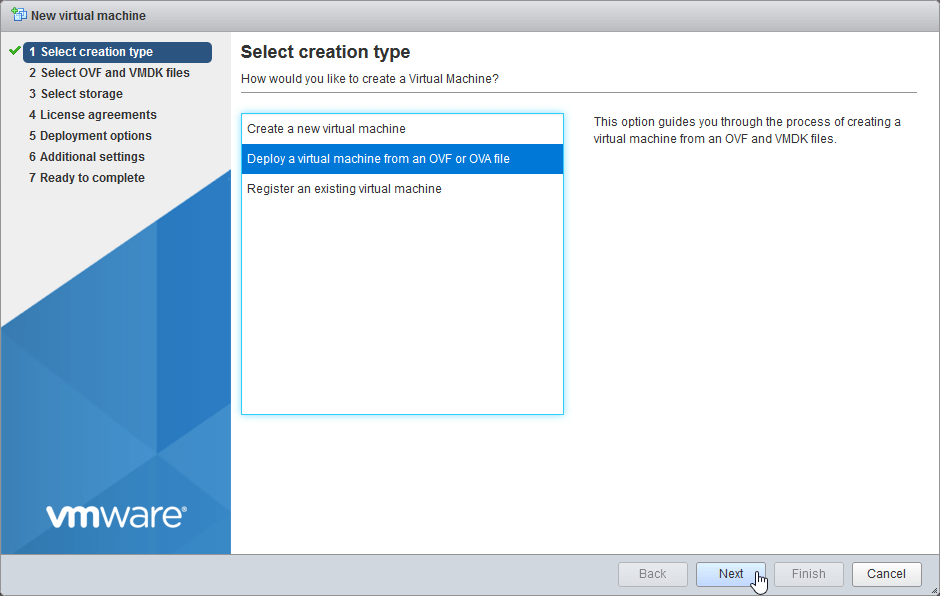
2.2 Select “Deploy a virtual machine from an OVF or OVA file”. Select Next.
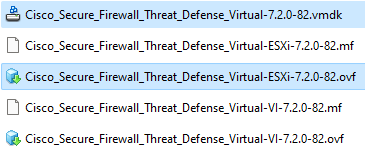
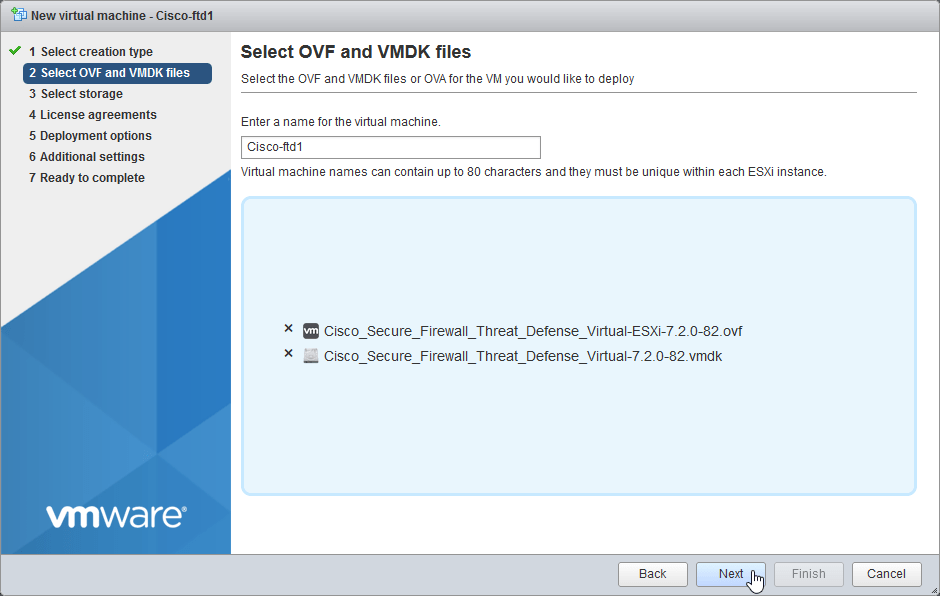
2.3 Enter name for the FTD Appliance “Cisco-ftd1”, Select or drag and drop the vmdk file and ESXi .ovf file. Select Next.
Note:
If you are deploying in vCenter use VI .ovf file.
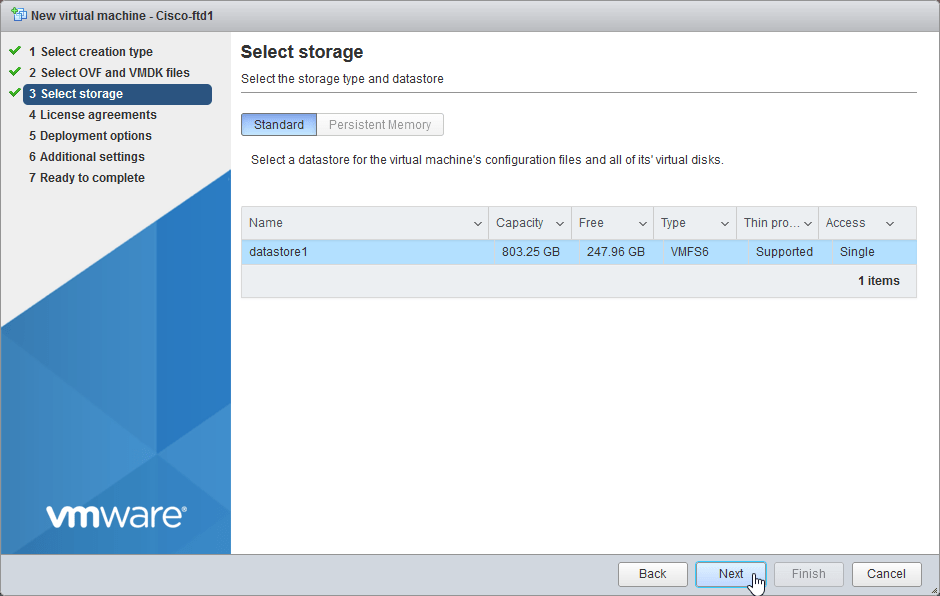
2.4 Choose your Datastore. Select Next.
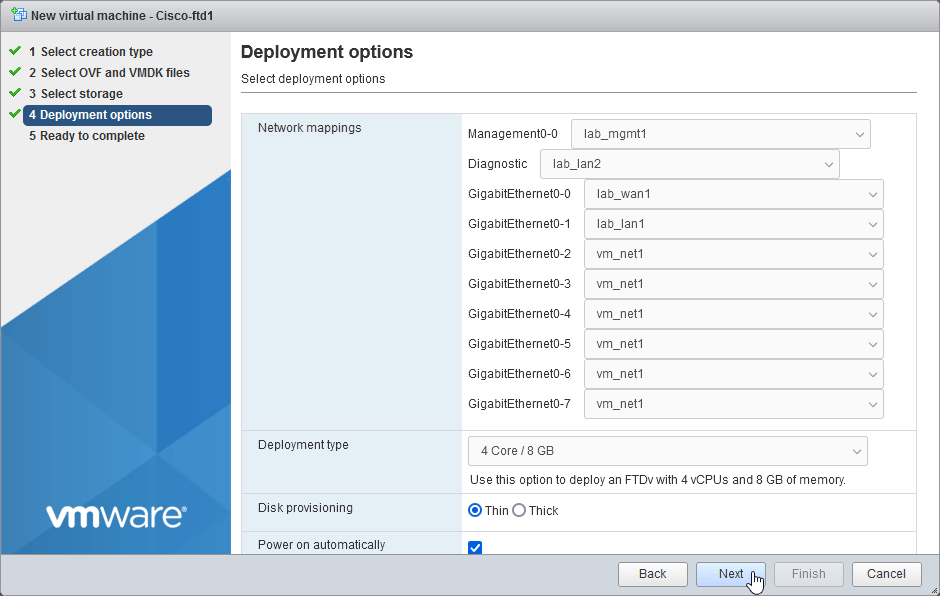
2.5 Configure your Network interface mappings and Deployment Type (according to your license / performance tier)
“Management0-0” – function Management (lab_mgmt1)
“Diagnostic” – function Diagnostic (lab_lan2)
“GigabitEthernet0-0” – function Outside Data (lab_wan1)
“GigabitEthernet0-1” – function Inside Data (lab_lan1)
“GigabitEthernet0-[2..7]” function Data traffic (optional)
more about Deployment options in Cisco Documentation – step 12
Deploy the Secure Firewall Threat Defense Virtual to a vSphere ESXi Host
Select Deployment type: 4 Core / 8 GB
more about Deployment type in Cisco Documentation – “Table 2. Performance Tiers”:
Disk Provisioning: Thin
more about VMware ESXi disk provisioning
Select Next.
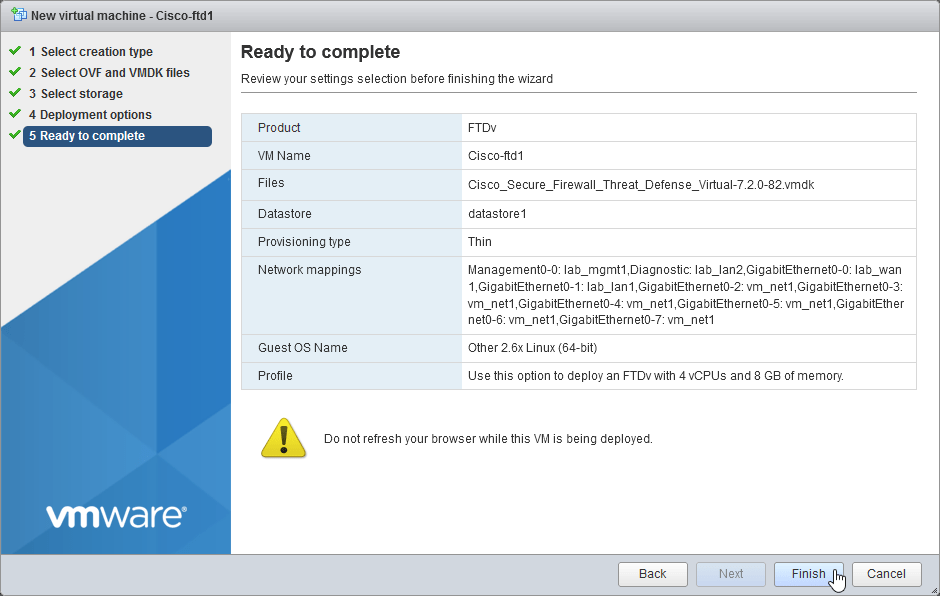
2.6 Review your configuration before finishing the wizard. Select Finish.
3. Complete the FTD setup using CLI
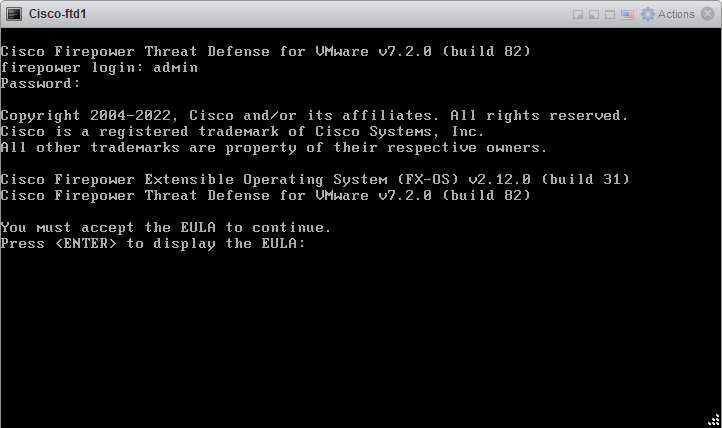
3.1 Open the VMware console and log in with default credentials: admin/Admin123, press Enter to display EULA. press Enter to accept EULA.
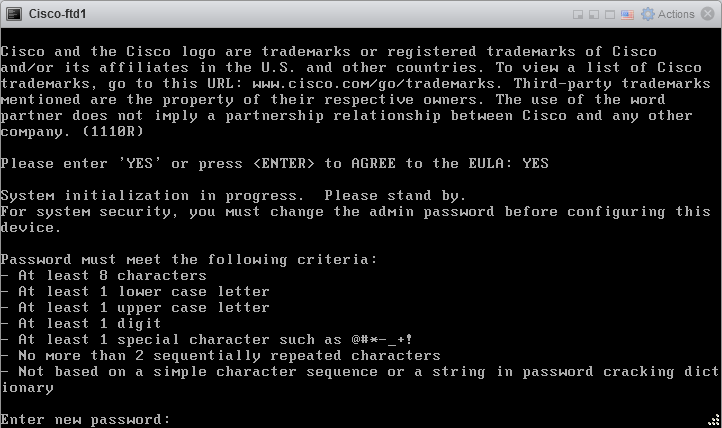
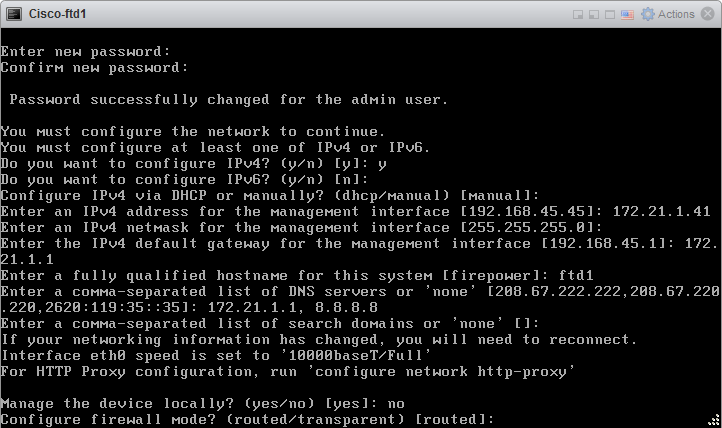
3.2 Enter new admin password.
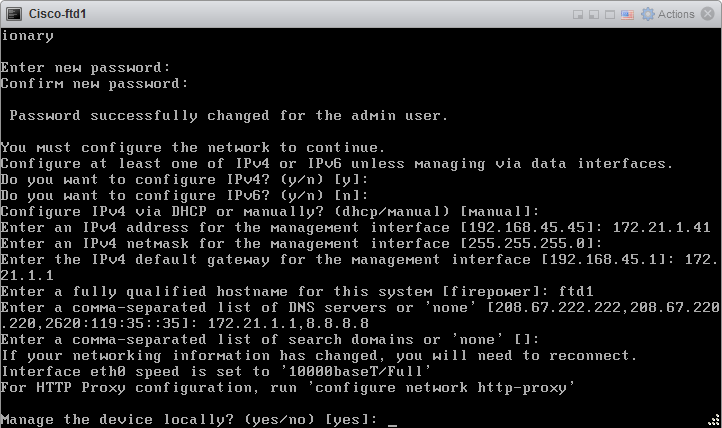
3.3 Configure network
Do you want to configure IPv4: y
Do you want to configure IPv6: n
Configure IPv4 via DHCP or manually: manual
Enter IPv4 address for the management interface: 172.21.1.41
Enter IPv4 netmask for the management interface: 255.255.255.0
Enter the IPv4 default gateway for the management interface: 172.21.1.1
Enter a fully qualified hostname for this system: ftd1
Enter a fully comma-separated list of DNS servers or ‘none’: 172.21.1.1, 8.8.8.8
Manage the device localy? yes
Note:
for managing the device locally with Secure Firewall Device Manager (included in FTD system) choose – yes
for managing remotely with Secure Firewall Management Center (additional standalone product) choose – no and go directly to Step 6. – Remotely managed FTD with FMC
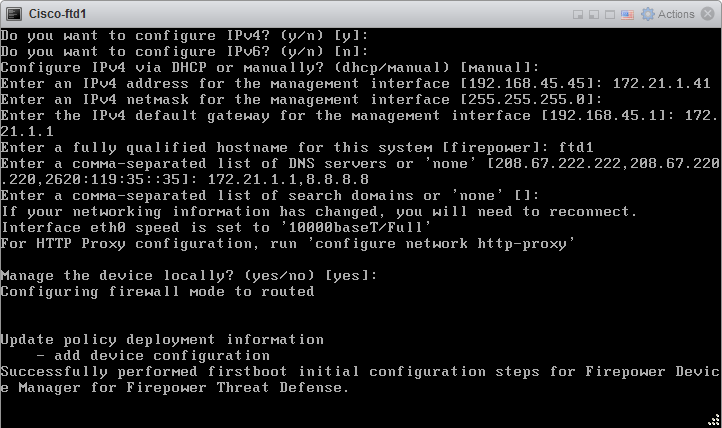
3.4 Initial configuration successfully performed.
4. Basic Secure Firewall Device Manager configuration
4.1 Log in to FDM with your account.
4.2 Configure Outside Interface Address
Configure IPv4: Manually input
IPv4 Address: 172.16.1.41
Network Mask: 255.255.255.0
Gateway: 172.16.1.1
Select Next.
4.3 Configure Time Setting. Select Next.
4.4 Choose license model or continue with evaluation period. Choose Performance Tier. Select Finish.
more about FTD Performance Tiers.
4.5 Choose “Standalone Device” unless you want manage the device from cloud. Select Got it.
4.6 Select “View All Interfaces”
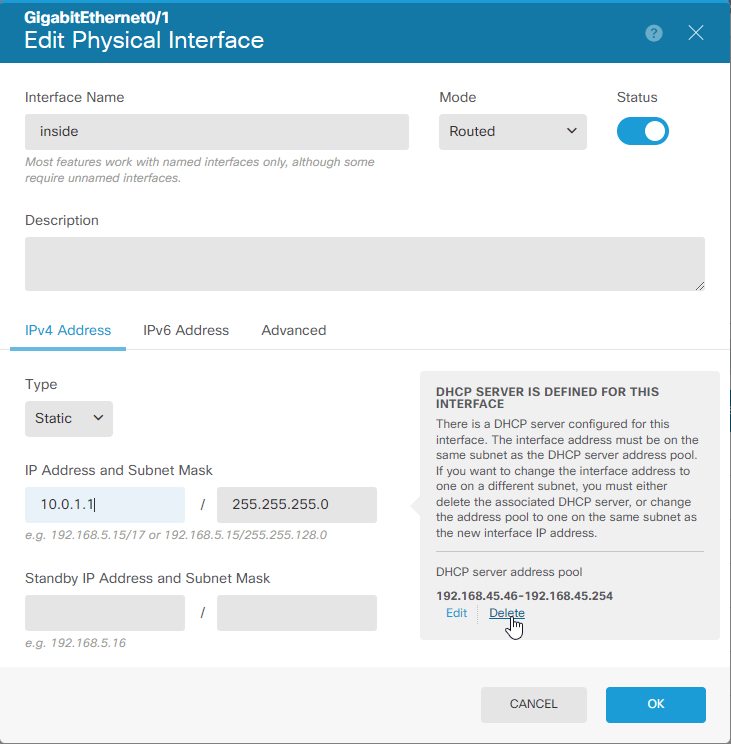
4.7 Select edit button on GigabitEthernet0/1 (inside interface)
4.8 Configure inside network interface.
IP Address: 10.0.1.1
Netmaks: 255.255.255.0
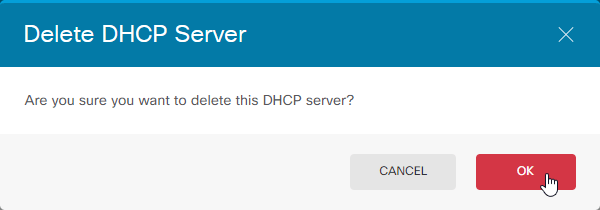
Disable DHCP Server (unless you want to use DHCP Service on the FTD), Select Delete.
Are you sure you want to delete this DHCP Server? Select Ok.
Acknowledge interface configuration, Select Ok.
5. Basic Policy configuration with FDM
5.1 Select “Policies” Tab – Access Control.
configure Policy according to your needs. (In this example Default Rule with Action “Allow”)
Note:
Trust – Allow traffic without further inspection of any kind.
Allow – Allow the traffic subject to the intrusion and other inspection settings in the policy.
Block – Drop the traffic unconditionally. The traffic is not inspected.
more about Configuring the Access Control Policy
5.2 Deploy pending changes. Select Deploy. Select Deploy now
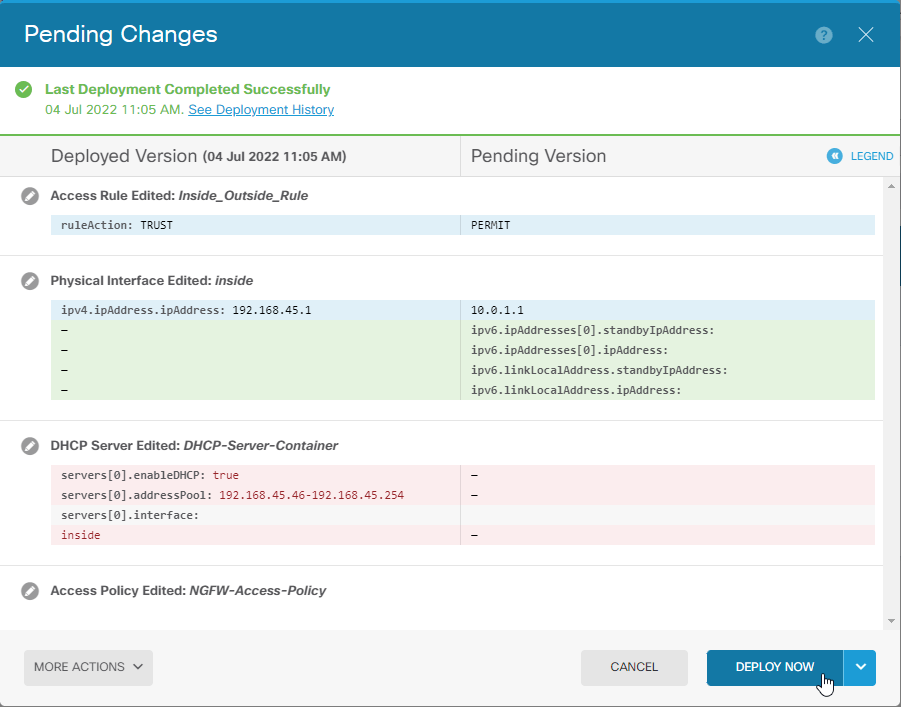
At this point we have functional locally managed Cisco Secure Firewall Threat Defense with basic configuration already processing the traffic and ready for advanced configuration in FDM – Secure Firewall Device Manager.
Cisco Secure Firewall Threat Defense Configuration Guide for Firewall Device Manager
6. Remotely managed FTD with FMC
6.1 Manage the device locally? (yes/no): no
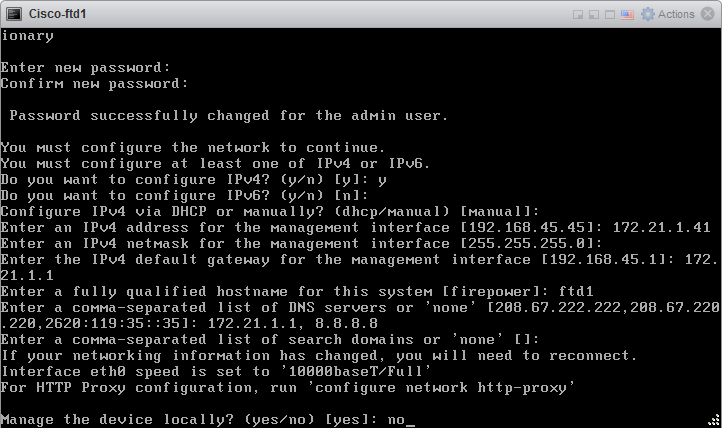
6.2 Configure firewall mode. Enter routed.
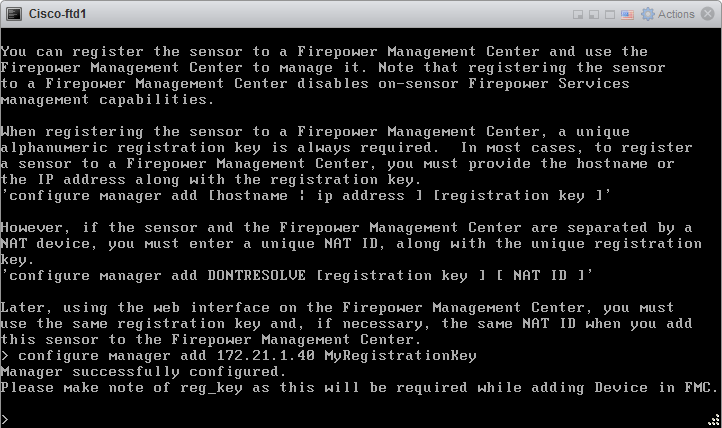
6.3 Configure Registration Key for the FMC
configure manager add 172.21.1.40 MyRegistrationKey
6.4 Log in to your FMC and Select Devices – Device Management.
Note:
If you are using Evaluation License then in popup window select “Start 90-day evaluation period without registration.”
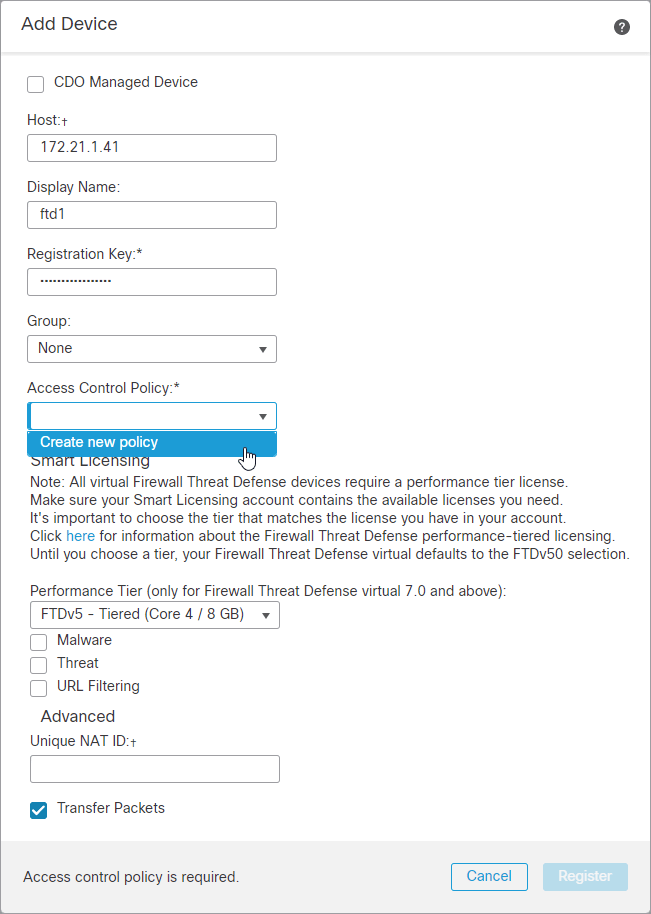
6.5 Select Add – Device.
6.6 Add the ftd1 device.
Host: 172.21.1.41
Display Name: ftd1
Registration Key: MyRegistrationKey
Group: None
Performance Tier: FTDv5 – Tiered (Core 4 / 8 GB)
Transfer Pakcets: Checked
Select under Access Control Policy – Create new policy
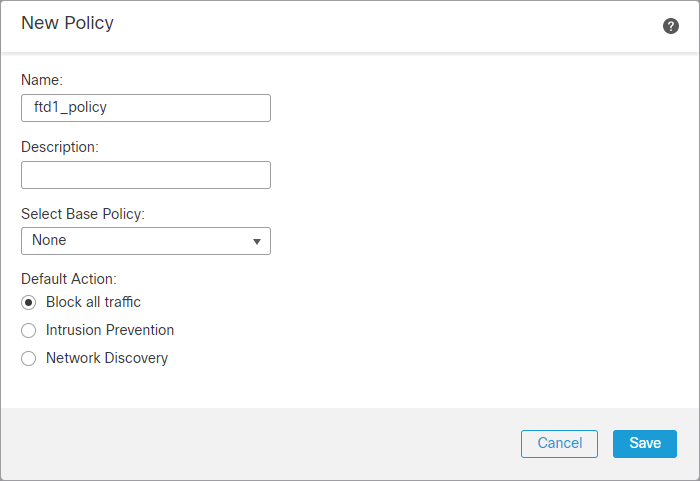
6.7 Create Policy
Name: ftd1_policy
Default Action: Block all traffic
Select Save. Select Register.
6.8 FTD Appliance “ftd1” is successfully registered to the FMC. Select ftd1 – Edit
more about Configure, Verify and Troubleshoot Firepower Device Registration
Note:
Red Exclamation mark will disappear once there is successful Threat Data Updates download from the Cisco Cloud and will show green ok icon
6.9 Configure ftd1 Interfaces
GigabitEthernet0/0
General /
Logical Name: wan1
Enabled: check
Security Zone: External
IPv4 /
IP Address: 172.16.1.41/24
GigabitEthernet0/1
General /
Logical Name: lan1
Enabled: check
Security Zone: Internal
IPv4 /
IP Address: 10.0.1.1/24
Click “Save”
7. Basic Policy configuration with FMC
7.1 Select Policies – Access Control – edit Policy
7.2 Add Rule(s)
for the test purposes I will add icmp test rule
Zones \
Name: icmp
Source Zone: Internal
Destination Zone: External
Applications \ icmp
7.3 Save and Deploy Policy
Cisco Secure Firewall Threat Defense Virtuall (FTDv) Appliance is successfully registered to Cisco Secure Firewall Management Center (FMC) and is ready for further configuration.
In this tutorial I described all necessary steps for FTD Virtual Machine Install, Configuration for localy managed FTD as well as remotely managed FTD by FMC. After Installation and Configuration of the FTD basic test Firewall Policy has been configured.
more about Access Control Policies


